A wedding cake can be an expensive addition to the big day. If you are on a tight budget, then instead of forgoing the wedding cake completely, why not make your own?
The great thing about a sponge wedding cake is the fact it can be put into the freezer for 3 whole months. This gives you ample time to create a showstopper.
If you are wondering how to make a 3 tiered wedding cake, then look no further. We show you how in this easy to follow step-by-step guide.
So, what are you waiting for? Let’s take a look at how to make a 3 tiered wedding cake.
Before You Start Baking The Wedding Cake
Before you start mixing the ingredients together to create the cake, you will need to know a few things first.
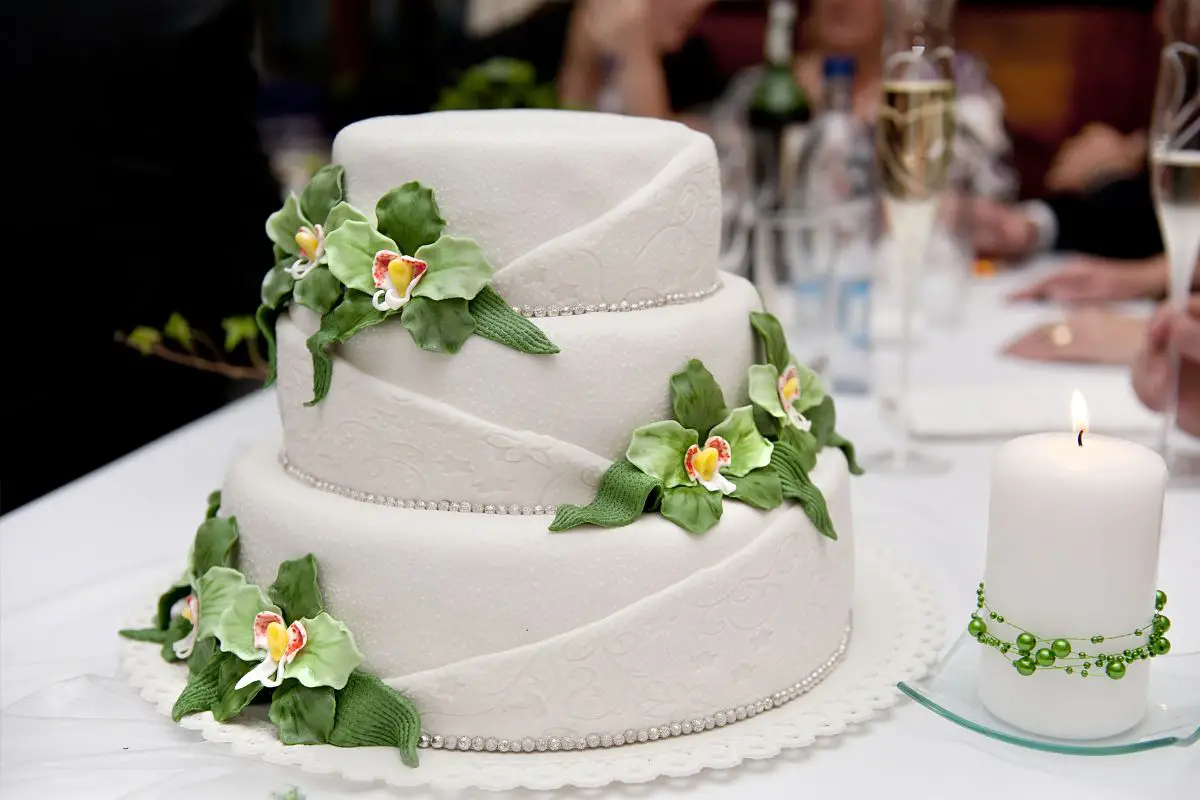
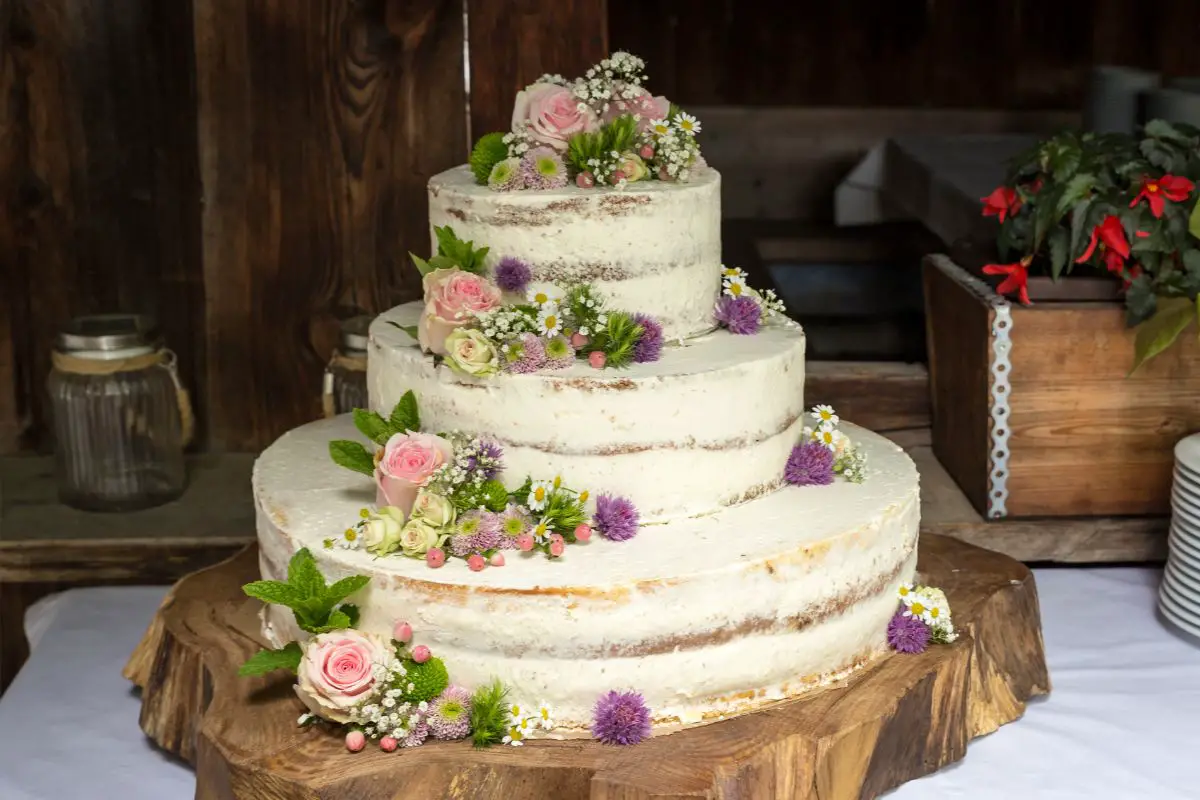
This cake is for a 3 tier which consists of:
Top – 6 inch
Middle – 8 inches
Bottom – 10 inches
Each of the tiers are in twos. This means that you will either need to bake two of each tiers, or slice them in half.
There will be a difference when it comes to the overall height of the cake, so you may want to do a trial run first.
What You Need
Ingredients For The Cake
Half cup of unsalted butter
2 and a quarter cups of all-purpose flour
A tablespoon of baking powder
One and a third cups of granulated sugar
One tablespoon of vanilla extract
Half teaspoon of salt
Two large sized eggs
A cup of 2 percent milk
A preserve such as jam or lemon curd for the filling. Or you can go with frosting, whipped cream or even a vanilla custard
Frosting
Tools
Cake pans which are round in sizes 6, 8, and 10 inches
Dowels
Turntable to rotate cake
Bowl
Wooden Spoon
Parchment Paper
14 inch cake knife
12 inch cake board
Spatula
Cake scraper
Stand mixer (or mix by hand)
Step-By-Step: How To Make A Wedding Cake
Step 1
The first step is to set the oven at 350 degrees Fahrenheit.
Butter the cake pans and line them with parchment paper to ensure the cake batter does not become stuck to the pans.
Step 2
Add the flour, sugar, baking powder and the salt into the bowl of the stand mixer. Using the paddle attachment, mix all of the ingredients together until combined.
Step 3
Put the mixer onto the lowest speed and add in the butter. Do so in chunks and finish once the mixture looks like sand.
Then add the vanilla extract followed by milk. Mix until everything is fully combined.
Step 4
On a medium to low setting, add an egg and mix. Follow this with another egg and mix until the mixture looks light and fluffy.
Once ready, pour the mixture into the set of cake pans.
Step 5
Place the cake pans into the oven until golden brown. Insert a toothpick or skewer into the center.
If it comes out clean then the cake is ready. If there is cake on the skewer or toothpick, leave the cake to cook for a minute or two longer.
The times depend on the size. Here is a rough guide:
6 inch – up to 30 minutes
8 inch – up to 40 minutes
10 inch – up to 60 minutes
You may find that once they are ready the sponge will pull away from the sides of the cake pan. The sponge will also bounce back when you poke it too.
This is very important for the bottom cake as you need it to be sturdy so it can hold the other two layers.
Step 6
Once the cakes have been baked, you will need to let them cool for around 10 minutes on a wire rack.
If you are baking in advance, now is the time to place the cakes tightly in plastic wrap. They will last for around 3 months when put into the freezer.
You can also make frosting in advance too. It will last for around a week before starting to go bad.
You need the cakes to be level. Cut off the tops to level the sponge. A serrated knife will do the job well.
If you plan to cut the cake in two, then you will need to do the exact same method as slicing off the top of the cake.
Step 8
Now that you have the layers, you will want to add your fillings. This could be anything from jam and lemon curd to buttercream frosting.
Spread it onto the cake layer and add on another layer of sponge like a sandwich.
Step 9
Once the layers have a filling, you will want to add a ‘crumb coating’. This is a very light and thin layer of frosting to act as a support to the main frosting.
It means that the main base will have no sponge crumbs too!
Using a palette knife, apply frosting to every cake. Start with the biggest cake first. Finish this with an ice smoother.
Step 11
Once iced and it has set, you will want to add the dowels for support. You can either place three dowels in a triangle through every slice in one go, or add the dowels as you go when stacking the cake.
If you choose the latter route, cut the dowels to size and place wax paper underneath each tier.
Final Thoughts
Now that you know how to make a wedding cake, all that is left are the decorations. From real flowers to sugarcraft delights, this is where the magic happens!
If you are on a tight budget for the big day, then you do have the option of making your own cake. Fortunately, it is really easy to do so. Plus you can freeze it in advance.