Letter cakes are often made for birthdays, but you could also bake a letter cake for an anniversary or any other celebration.
There’s no denying that letter cakes are fun to look at and can be more meaningful than the average cake, but they’re not easy to get right by any means.
You have to get that light, airy texture perfect and, of course, there’s the matter of executing the shape so that the letter is recognizable.
Plus, there’s the decoration. You don’t have to stick to any specific rules when it comes to decorating a letter cake, but most feature some kind of decoration, whether that’s fruit or macarons, or even sugar flowers.
If you want to make a professional-looking letter cake yourself, you’ve come to the right place.
We’re going to be sharing our ultimate recipe for the perfect letter cake, as well as our recommendations for fillings and frosting types.
We’ve also collected our favorite letter cake tutorials as well as some pictures to inspire you in your creative process.
So, without further ado, let’s learn how to bake the letter cake of your dreams!
Letter Cake Recipe Overview
Letter cakes have definitely become a trend in the baking world, and we love to see such an interesting cake design take off like this.
In the past, many people assumed that if they wanted a cake in the shape of a specific letter with elaborate decorations, they would have to make it themselves.
However, those days are gone, and as of today, anyone can make their own letter cake at home with the right recipe and enough commitment.
What makes our recipe so much easier to follow than the average letter cake recipe is the fact that you don’t even need to buy a cake pan in the shape of your chosen letter.
For our recipe, all you need to do is get a sheet pan and cut the letter shape out of your cake using a template. Not only will this save you money, but it also allows you to be more creative with your letters.
The recipe we’re going to share with you today uses whipped cream cheese for a richer flavor and slightly denser texture.
We like how this turns out, but a lot of letter cakes are a little bit lighter with an airier consistency, so if that’s what you’d prefer, you can simply use regular whipped cream rather than cream cheese.
We haven’t included any instructions for decorating, because this is an opportunity for you to get creative and adorn your cake exactly how you imagined it.
A lot of vanilla-flavored letter cakes are decorated with various types of fruit, including berries, but you can use any kind of decoration you like.
We’ve included some pictures below for inspiration in case you need some prompts.
The Ultimate Letter Cake Recipe
Our letter cake or alphabet cake recipe takes 1 hour and 40 minutes to make in total. Most of this is prep time, which should take roughly an hour, and the cooking time is 40 minutes.
A single serving of this cake contains 328 calories, and the whole cake should produce about 12 servings, although these estimates will depend on the letter you choose to create.
Before we get into the recipe itself, we’re going to share the entire nutritional profile of our letter cake recipe.
Bear in mind that the method is divided into three parts: one for the cake batter, another for the syrup, and the final section for the frosting.
We’ve included instructions for the cream cheese whipped cream frosting as well as the regular whipped cream frosting.
While we have shared some suggestions for the types of decorations you might want to include, this part is entirely up to you, so don’t be afraid to deviate from the list.
Nutritional Information
Here is the nutritional information per serving that you should know before you make our letter cake recipe:
Energy (kcal): 328
Carbohydrates: 32 g (11%)
Sugar: 21 g (23%)
Fat: 20 g (31%)
Saturated Fat: 12 g (75%)
Protein: 3 g (6%)
Potassium: 104 mg (3%)
Calcium: 58 mg (6%)
Sodium: 213 mg (9%)
Fiber: 0 g (0%)
Iron: 0.8 mg (4%)
Vitamin A: 775 IU (16%)
Vitamin C: 0.2 mg (0%)
Cholesterol: 90 mg (30%)
The percentages included in this nutritional profile are based on a caloric intake of 2000 calories per day. If you typically eat more or less than this, you will need to amend the percentages accordingly.
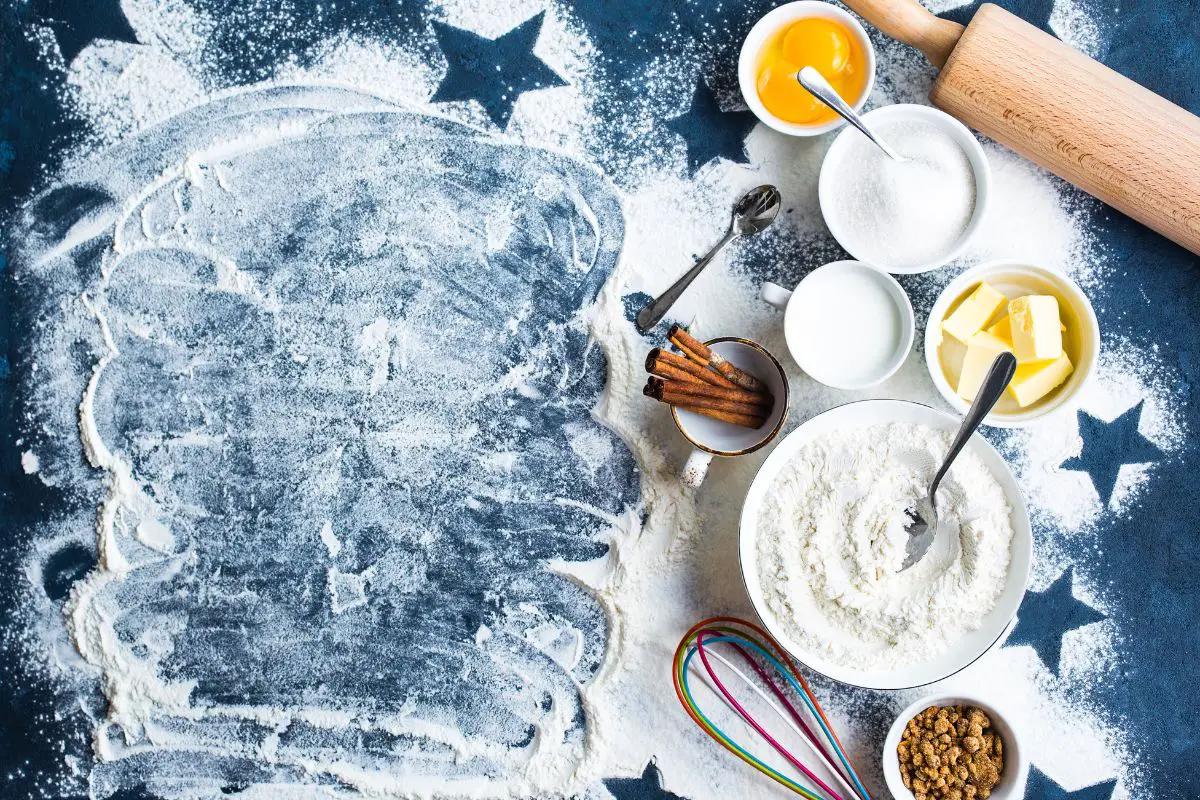
Ingredients List
To make this letter cake recipe, you’re going to need:
Batter Ingredients
All-purpose flour (3.5 cups / 437 g)
Granulated sugar (2 cups / 400 g)
Baking powder (2 tsp)
Unsalted butter (1.5 cups / 340 g)
Buttermilk (1 cup / 240 ml)
Baking soda (1 tsp)
Salt (0.5 tsp)
Large eggs (5)
Vanilla extract (2 tsp)
Syrup Ingredients
Sugar (0.5 cup / 100 g)
Water (1 cup / 240 ml)
Lemon juice (1 tsp)
Cream Cheese Whipped Frosting Ingredients
Cream cheese (2 cups / 470 ml)
Whipping cream (2 cups / 470 ml)
Powdered sugar (1 cup / 120 g)
Vanilla extract (2 tsp)
Whipped Cream Frosting Ingredients
Whipping cream (3 cups / 700 ml)
Powdered sugar (0.5 cup / 60 g)
Ideas For Decorations
Chocolate
Berries
Candy
Macarons
Cookies
Sprinkles
Sugar flowers
Method
Making The Cake Batter
The first step is to make sure your oven is preheated. If you don’t preheat your oven first, the cooking time will be impacted. Your oven should reach 325 degrees Fahrenheit or 165 degrees Celsius before you put the cake batter in to bake.
Make sure to grease your two cake pans. The cake pans should both measure 13 inches by 11 inches for a larger cake, or you can use 3 pans measuring 7 inches by 10 inches for a smaller but thicker cake. Once the pans are greased, line them with parchment paper as well to prevent any issues with sticking.
Sift all the dry ingredients together in a bowl. You should end up with an even mix of baking powder, flour, salt, and baking soda.
Use your stand mixer to mix the sugar and butter until you get a light, yet creamy consistency. This should happen after about 3 minutes of consistent whipping, and the finished product should look and feel fluffy.
Add your eggs individually. This is important because if you add all the eggs at once, you might curdle the mixture. While this can be fixed by adding another tablespoon of flour, it may impact the overall texture of the cake slightly, and it’s best to avoid needing to amend the recipe.
Pour the vanilla extract into the mixture.
At this point, you can fold your flour mixture as well as the buttermilk into the bowl. Again, you don’t want to put it all in at once. Add the ingredients in three portions and make sure they’re well-combined without being over-mixed. Over-mixing will activate the gluten in the flour, which is not what you want.
Pour your cake batter evenly into each of your sheet pans, making sure to go over the top with a spatula to ensure there are no inconsistencies in the spread of the mixture. It’s also a good idea to gently tap the pan before putting it in the oven so that the batter can settle without any air pockets.
Put the pans on the center rack of your oven and bake for up to 25 minutes. If you’re not sure when to remove the cake from the oven, use the skewer test.
Allow 10 minutes for the cakes to cool before turning the pans upside down and transferring the cakes on cooling racks. Leave them until they have cooled throughout, and in the meantime, move on to the other stages of the recipe.
Boiling The Sugar Syrup
Add the water, sugar and lemon juice to a saucepan and turn the heat up to a medium temperature.
Bring the mixture to a boil and wait for all the sugar to dissolve in the liquid. Once the sugar has dissolved completely, allow another minute for boiling before turning off the heat
Leave the mixture to cool in the saucepan while you move on to preparing the frosting.
Preparing The Frosting
To make the regular whipped cream frosting, just combine cream and powdered sugar in your stand mixer using the whisk attachment until you reach a stiff peaks consistency.
Alternatively, if you want to make the cream cheese whipped cream, follow roughly the same process, but use the paddle attachment. Mix the sugar and cream cheese until the consistency gets fluffy, and then add the whipping cream (which should be chilled beforehand). Keep whipping until stiff peaks form, and then add your vanilla extract.
Putting The Cake Together
You may have printed your letter template beforehand, but if not, now is the time to do it. Make sure to print the template in the right size so that it fits within your sheet pan.
Put the template on top of the first cake layer and cut around it carefully. Repeat for the other layer(s).
Brush the bottom layer of the cake with the syrup and use a piping bag to add frosting before carefully putting the second layer on top.
If you’re only using two layers, finish with another covering of syrup and frosting. If your cake has a third layer, repeat the layering process again and then add the last of the syrup and frosting.
At this point, you can decorate your cake however you want. Look at our decoration suggestions above or at the picture gallery below if you need inspiration!
Our Frosting And Filling Recommendations
As you can see, we’ve provided two different options for your filling and frosting mix in our recipe.
That’s because some people will prefer a lighter frosting, whereas others prefer something richer and more dense.
Typically, letter cakes are either filled and frosted with whipping cream or with eggless pastry cream, which is usually flavored with vanilla.
However, you don’t have to stick with the traditional options. After all, the point of a letter cake is to make it personal, so you should do whatever you or the intended recipient of the letter cake will enjoy the most.
If you like a really buttery, creamy filling and frosting for your desserts, you could opt to use vanilla buttercream, which you can make in a variety of different styles.
The great thing about buttercream is that it’s very versatile. There’s almost no limit to the kind of flavoring you can add to a buttercream filling.
Helpful Letter Cake Tutorials
If you’re someone who prefers to have visual prompts for extra guidance when following a recipe, don’t worry – there are plenty of video tutorials for letter cakes available online!
Following these tutorials may help you to get an idea of the consistencies you’re looking for and the best way to add decorations.
Here are the most useful tutorials we found online for letter cakes:
Because letter cakes typically consist of at least two layers, doming can be a real problem because you will need the surfaces of your layers to be flat in order to stack them neatly and prevent the cake from collapsing.
To prevent doming and stop the edges of your cake from caramelizing, we recommend using some cake strips.
These are absorbent strips that you can secure onto the sides of your cake pan.
They are designed to maintain the moisture content of your cake while stopping the top of the cake from doming or getting crusty.
Why Is The Frosting Melting When I Decorate My Letter Cake?
Melting frosting can be a nightmare to deal with, but it can be prevented by allowing the cakes to cool down fully before you add any syrup or frosting.
If the cakes are even slightly warm when you add the frosting, you will probably end up with messy, melted frosting and filling, which can ruin the overall look of your bake.
What Is The Best Way To Cut Out A Letter Cake?
Using a template for your letter cake makes it easier to get even layers and a recognizable shape. However, if you use the wrong cutting tool or technique, you could still end up with messy edges.
We recommend using a paring knife (ideally, a small one to increase accuracy) and carefully cutting around the template. If you want your lines to be as straight as possible, use a ruler to guide you as well.
Something that might also help is to secure the template onto the top of each layer with a small amount of syrup. This will prevent the template from shifting as you cut around it, ensuring that all layers come out exactly the same.
Should I Chill My Letter Cake Before Frosting Around The Outside?
Once you have stacked all the layers with the syrup and filling, it’s a good idea to put the cake in the refrigerator to chill for a little while before you frost the outside edges.
This is because the cool temperature inside the refrigerator will help to harden the filling slightly, holding the layers together more firmly so that they don’t shift as you add more frosting to the edges.
How Can I Fix Uneven Layers For A Letter Cake?
If you have cut out your letter cake layers, and they’re not exactly the same size, don’t panic. Stack them on top of each other and gently use your paring knife to trim off any parts that stick out.
Final Thoughts
Making a layer cake is a fun project and a great example of how baking can be both creative and personal.
Be sure to check the size of your template before you start baking, and allow your cake layers to cool down completely before you start frosting and decorating.
When it comes to the frosting and filling, you have a lot of options, so consider the different types of whipped cream and buttercream you can use as well as the flavors you want to incorporate before you settle on an idea.
Most importantly, remember to use your imagination and have fun!
I discovered your blog site on google and check a few of your early posts. Continue to keep up the very good operate. I just additional up your RSS feed to my MSN News Reader. Seeking forward to reading more from you later on!…
Hey! I could have sworn I’ve been to this site before but after browsing through some of the post I realized it’s new to me. Anyhow, I’m definitely glad I found it and I’ll be bookmarking and checking back often!
I’m impressed, I need to say. Really not often do I encounter a weblog that’s both educative and entertaining, and let me let you know, you’ve got hit the nail on the head. Your idea is outstanding; the difficulty is one thing that not enough individuals are speaking intelligently about. I am very completely happy that I stumbled throughout this in my search for something referring to this.
Nice post. I was checking constantly this blog and I am impressed! Extremely useful info specially the last part 🙂 I care for such information much. I was looking for this certain info for a long time. Thank you and good luck.


Leave a comment