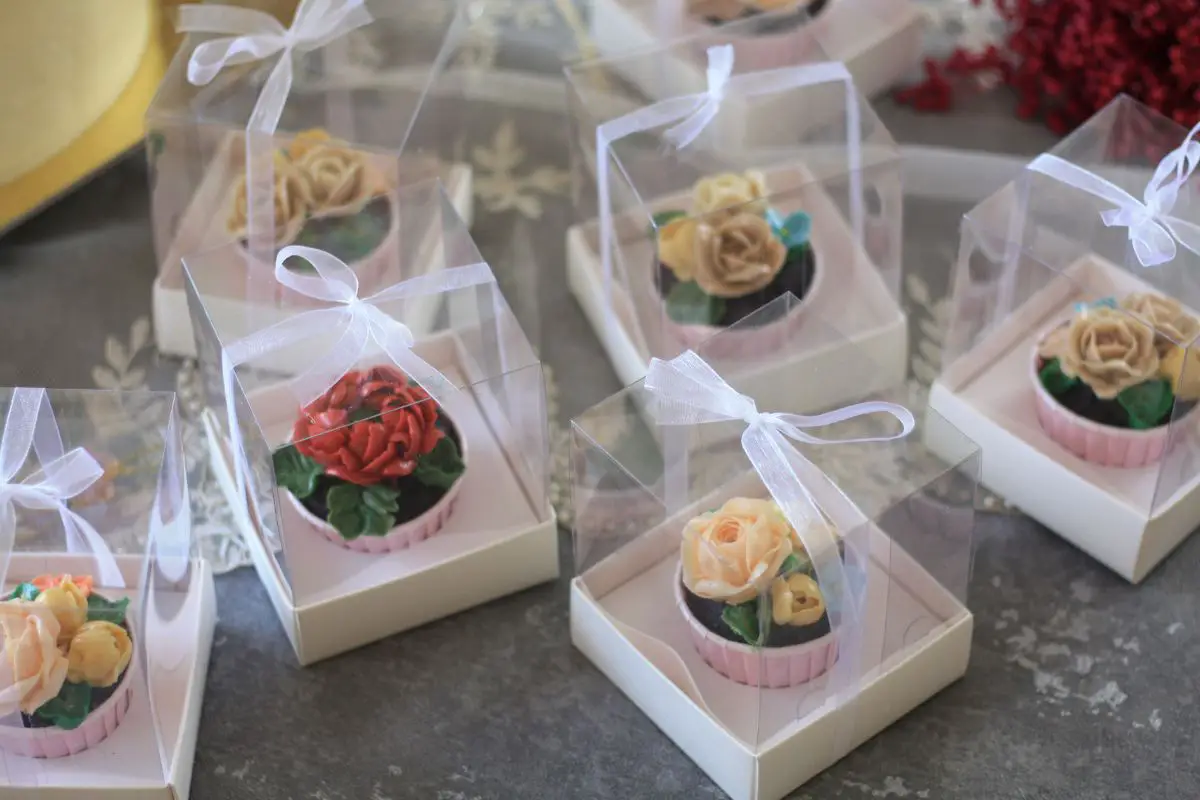
There isn’t anything more precious than buttercream flower cupcakes. Not only do they look impressive, but, thanks to the buttercream, they taste delicious, too!
Although don’t let their spectacular appearance intimidate you, they are surprisingly simple to make!
Plus, with the help of this guide, you’ll be whipping up some beautifully delicious buttercream flower cupcakes in no time.
Like all things, the more you practice, the better you’ll get – this is the same for these buttercream flowers(see also: Korean Buttercream For Sugar Flowers).
With this in mind, this article will help teach you how to make buttercream flower cupcakes, providing you with a few tips and tricks along the way.
What You’ll Need
Before you start with the frosting, you’ll want to bake your favorite cupcakes and allow them to completely cool down – this step is important to avoid any melting buttercream.
While your cupcakes are cooling, you can start preparing the American-style buttercream frosting. You can use whatever recipe and flavor you desire.
However, keep in mind that different flavors, such as chocolate, will create brown flowers. Therefore, if you want striking, vivid flowers, then you should opt for white buttercream.
Likewise, you’ll also need a flower nail – this will help you later on when you begin frosting your cupcakes.
Buttercream Flowers Step-By-Step
With your piping bag, attach the coupler and petal tip. Then, fill the bag with your choice of colored buttercream. For the best results, you’ll want to begin with a solid color. Once done, replace or fill another bag with a different color to create two-tone, realistic flower petals.
Place a small amount of buttercream onto the flower nail and then attach a square of parchment paper to it. Here, the buttercream is used as glue, keeping the paper attached to the nail.
Using the pointy end of the petal tip, position it facing up and apply enough pressure to the bag to create a small, round circle of frosting. Using your other hand, rotate the nail at the same time – this creates the center of the flower.
Once you have finished the center, it’s time to start making your first petals. Here, start by piping a layer of frosting halfway across the first circle, encircling the buttercream until the circle’s ends meet.
Using the same method, you’re going to create your next petal. Start the petal on top of the one you just made, then allow the petals to go around a third of the way around the center. Remember to keep the petal tip straight, preventing the petal from curving too much. This is important because as your flower gets bigger, there won’t be enough space to add more petals.
In the same manner, continue to add more petals over the previous ones. Sticking to the rule of threes – make sure each petal is approximately a third of the flower’s circumference. Of course, as you begin adding more petals the circumference of your flower will change, as will the length of the petals, too.
Although, if you wish, you can break this rule, too. Like nature, all flowers are unique. Therefore, if you feel like your flower is in need of more petals, then simply go for it! Likewise, you can change the angle of the nozzle to make the flower more open or closed. As such, you can use this method to create smaller, un-blossomed flowers, too.
Once you are happy with the number of petals on your cupcake, then you can begin to carefully remove the parchment paper from the nail and transfer your creation to a tray or baking sheet. If your flower doesn’t look perfect, just remember that practice makes perfect. Don’t worry if your first couple of flowers don’t look how you would expect.
When making your second type of flower, simply begin with the petal tip on the outside of the parchment paper. Holding the icing bag tightly, squeeze the buttercream in one continuous motion – as if you’re piping the letter ‘M’, connecting over and over again. Continue this while turning the nail until you have reached the center.
Once you have made the first ‘M’ connection, continue the same motion to create the next petal – making sure to slightly overlap the layers. If you have room, then you can create a third rotation.
When you have finished piping your flower, place your baking parchment or tray into the freezer and keep them in until they are solid to touch – this is around 30 minutes.
After the time is up and your buttercream is solid, you can now transfer your flower onto the top of your cupcakes. Here, you’ll want to work in batches or quickly since the buttercream has the tendency to soften quickly.
Before you place the flowers, spoon some extra buttercream onto your cupcakes as this is where the flowers will be placed. Moreover, this acts as a glue to prevent the flowers from moving. Using your fingers, gently press the flowers into place – being careful not to break them.
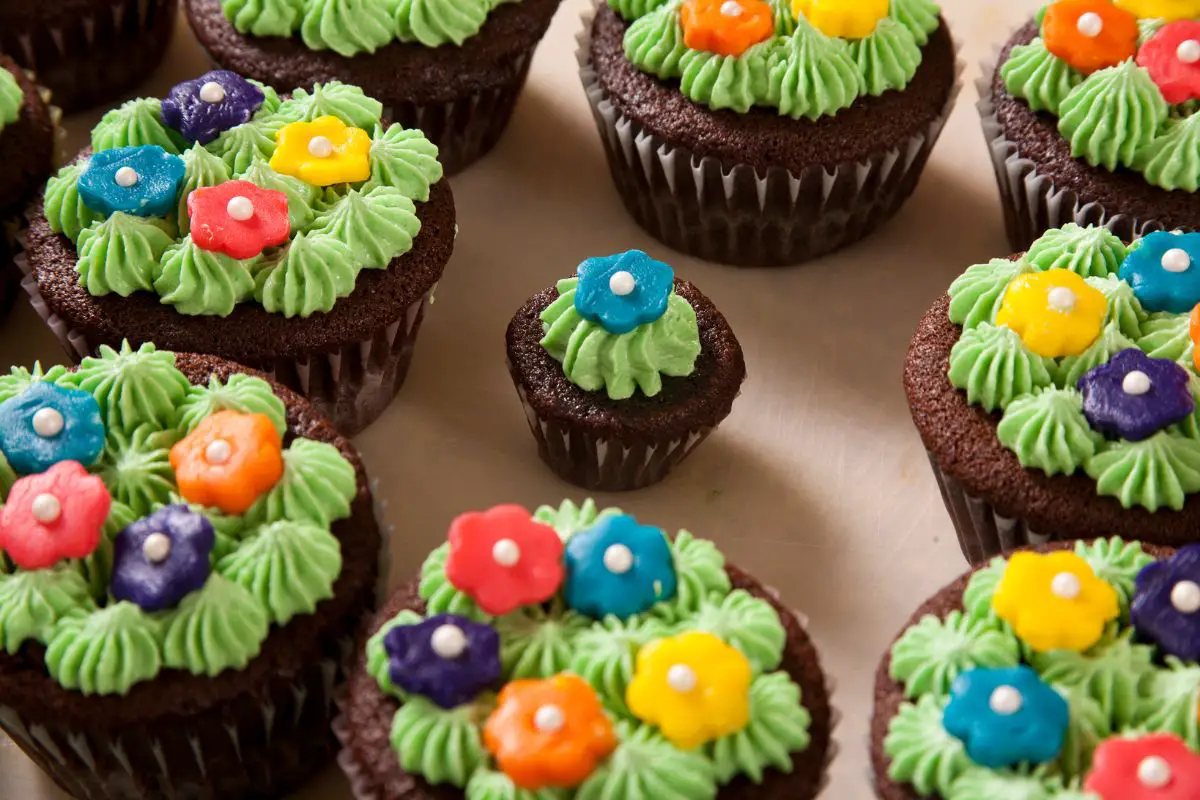
Once done, you can use the open star, round, and leaf tips to add some finishing touches, such as leaves. To do so, simply position the tip of the pointy nozzle facing up and pull the bag out while squeezing for a textured leaf design. Next, you can use the star and round tips to create some extra foliage details.
Final Thoughts
Perfect for birthday parties, baby showers, and even weddings, buttercream flower cupcakes are sure to impress. Not only do they look incredible but the buttercream tastes delicious, too!
That said, their intricate appearance is enough to turn some people away from making them. However, don’t be afraid, they are surprisingly simpler to make than you may think.
Hopefully, this guide has informed you about everything you need to know about making buttercream flower cupcakes.
Does your website have a contact page? I’m having a tough time locating it but, I’d like to send you an e-mail. I’ve got some ideas for your blog you might be interested in hearing. Either way, great site and I look forward to seeing it improve over time.


Leave a comment